Last week i wrote an article with full details how can export & Import Virtual Machine in HYPER-V. I try to give detailed description an explain all the options. But as realize i didn't wrote how can do it with powershell. Some of them maybe find easier to do it from GUI Enviroment. But don't forget with Powershell can automate the process in one click without need to do all the steps that i describe in articles Export & Import Virtual Machine in HYPER-V last week.
Today i will explain step by step how can do it with Powershell.
source = HYPER-V Host which want to export the VM
destintion = HYPER-V Host which want to import the VM
Export Virtual Machine withe Powershell
- Open Powershell as Administrator from the source HYPER-V Host.
- Type the command to list all the Virtual Machines
get-vm - Find the Virtual Machine Name that you want to export.
- For the scenario i decide to Export the Windows 7 Virtual Machine.

- Type the following command to start Exporting the Virtual Machine
export-vm -Name "Windows 7" -Path E:\

- For more details what folders exporting read the article Export & Import Virtual Machine in HYPER-V
- Unfortuantely from Powershell i can't see any progress. If you have GUI Enviroment open the HYPER-V Manager to check the Progress. Unless wait until finish.

Compare Virtual Machine and HYPER-V Host for Incompatibilites
To prevent errors and reduce time for the Import. Before proceed to import Virtual Machine we can check any incompatibilites in configuration betwen source and detination HYPER-V Hosts
- Login in the destination HYPER-V Host
- Copy the Virtual Machine Folders in the appropriate folders that configure in destination HYPER-V Host for Virtual Machines and Virtual Hard Disks.
- Open Powershell as Administrator
- Now these commands are very intrestings. Type the following command to check incompatibilites. In -Path type your own path for the xml file of the Virtual Machine.
Compare-VM -Path 'D:\Virtual Machines\Windows 7\Virtual Machines\A7B9F06D-1B2A-47B1-B229-3BF41D40DF54.XML'
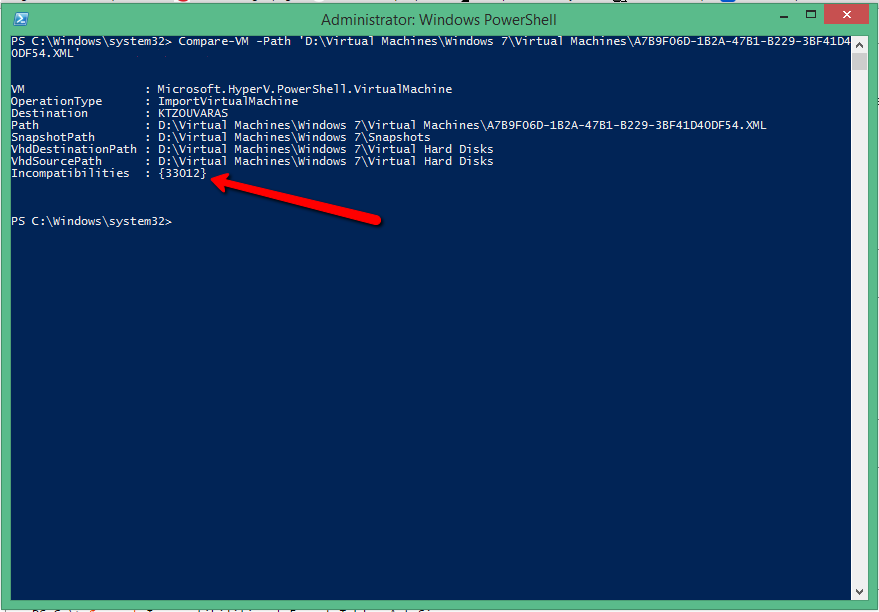
- Oops i get one number in Incompatibilities. But what does this mean this number?
- Type the following command to capture the error and get the Message
$compareResults=Compare-VM -Path 'D:\Virtual Machines\Windows 7\Virtual Machines\A7B9F06D-1B2A-47B1-B229-3BF41D40DF54.XML'

- Type the command to see error message
$compareResults.Incompatibilities

- Here i have only one error but maybe the results are more than on elink.
- To see the first error type
$compareResult.Incompatibilities[0].Message
![]()
- Now i see that the problem is the Virtual Switch Name. Because in the destination HYPER-V Host i have different name for Virtual Switch.
- But how can fix the error?
- With some research i found that the $compareresults act in an object and refere as Compatibility Report in the Microsoft Technet Page
- I can use $compareresults to fix the error.
- Type the following command to disconnect the network adapter of the VM
$compareResult.Incompatibilities[0].Source | Disconnect-VMNetworkAdapter

- Type the commnd to list all the Virtual Switches in the HYPER-V Host.

- I want to connect the Virtual Machine in the Virtual Switch Lab_Network
- Type the following command to connect Network Adapter of th Virtual Machine in the appropriate Vitual Switch from the destination HYPER-V Host
$compareResult.Incompatibilities[0].Source | Connect-VMNetworkAdapter -SwitchName "Lab_Network"

- Now type the following command to check if incompatibilities resolved.
compare-VM -CompatibilityReport $compareResult

- As i can see all it's fine
Import Virtual Machine with the modified Compatibility Report
All it's good until now but i must import the Virtual Machine with the specific Compatubility Report which modified and resolve the incomaptibilities. If try to import the Virtual Machine with the usuall way then you will get errors for the incompatibilities.
So type the folloing command to import the VM. If you remember when copy the Virtual Machine folders paste it in the appropriate folders which use HYPER-V Host for the Virtual Machines and Virtual Disks. So the type that will imported is the Register. For more details for the types that can import a Virtual Machine read the article Export & Import Virtual Machine in HYPER-V.
import-vm -compatibilityreport $compareResult

Now type the command to list all the Virtual Machines
get-vm

This time because you have already transfer the virtual machine folders in the appropriate path that configure in destination HYPER-V Host it will not take time to import the Virtual Machine.
Very intresting Powershell commands that can be proactive and resolve any error before start the Importing.
What is your experience with this method? Do you know that can Comprare the VM before import in new HYPER-V Host with Powershell? Use our Comments to tell your experience or your opinion for the related topic.
Have a nice weekend!!
Sponsor
>

Free Tools for everyone


