How to configure a network adapter with powershell
Network adapter configuration is a common task for all the IT Professionals. When setup a new Windows Server, when configure storage connection with the Windows Server, Vlans, iSCSI, Failover Cluster Network configuration and more ...
Usually to configure the network adapter we use the Graphics user interface. To be honest lot of of times i use it too.
But powershell can give you the automation and more visibility in the configuration.
Also network adapter configuration with powershell can be helpful when we have lot of VM's.
Maybe at the first times you will think that needs more time but believe me you don't need.
It will be reduce your time and automate your task.
So let's start !!
How to Get a list of all the Network Adapters
I am sure that you have use it lot of times in the past.
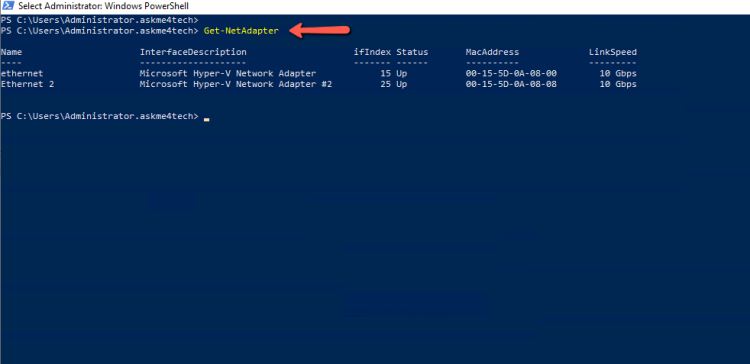
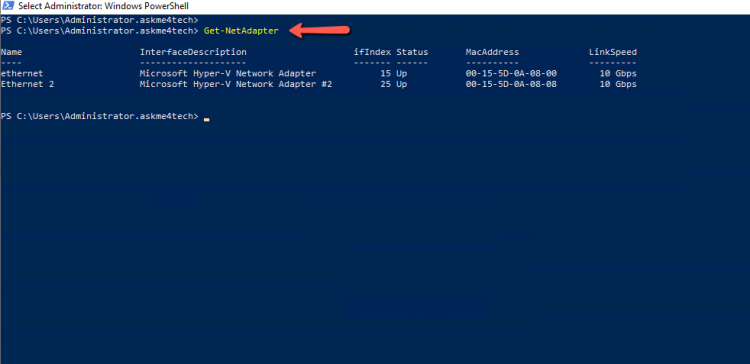
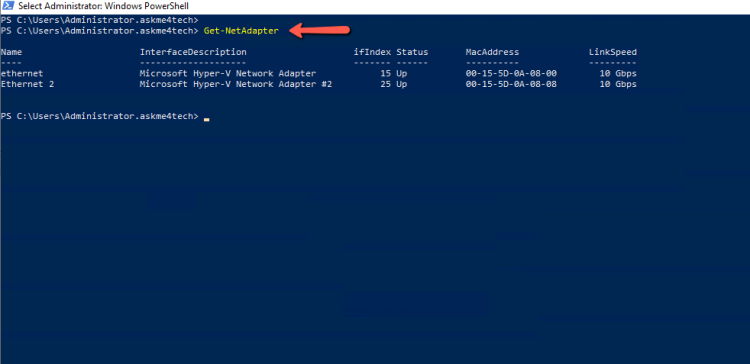
But it's essential because for every change must be known the network adapter name or the index of the adapter. To find these info must use the get-netadapter.
Get-NetAdapter
How to get the ip address of the Network Adapter.
If you need to find out the Ip Addresses from each network adapter you can use the following command. However you can get some info like name or ifindex that can use it to get configuration from specific network adapters
Get-NetIPAddress
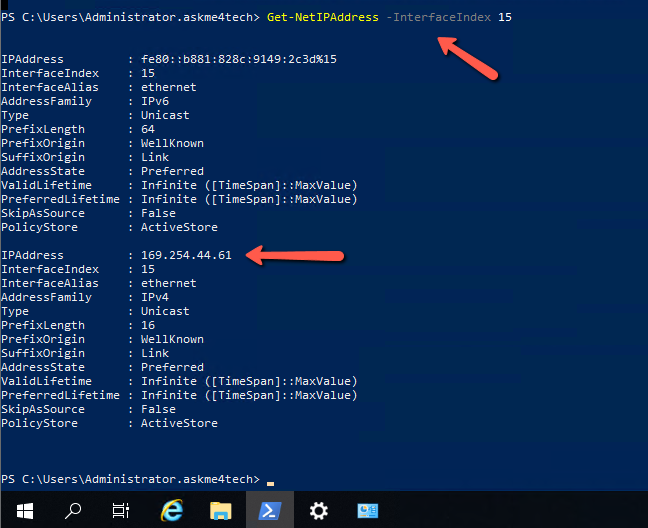
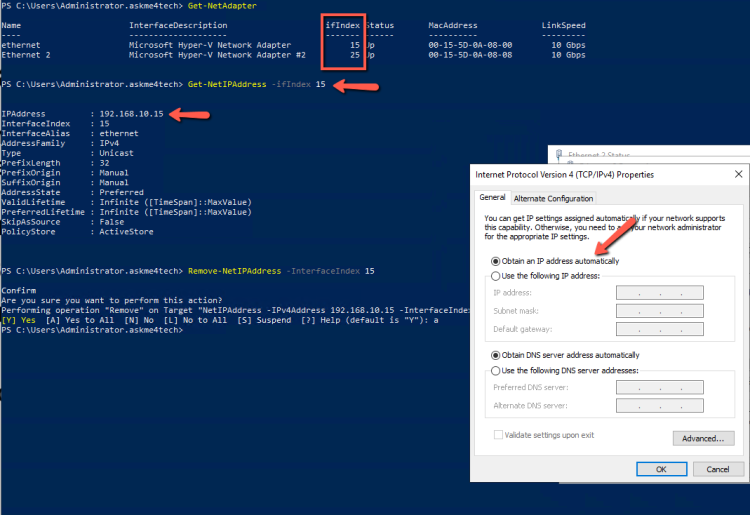
Then if you want to get the ip address for the specific network adapter use the InterfaceIndex which correspond to ifindex from the above image
Get-NetIPAddress -InterfaceIndex 15
How to change Network Adapter from DHCP to Static IP Address
If you would like to change the ip address of the network adapter from the DHCP to Static then you can use the command new-netipaddress.
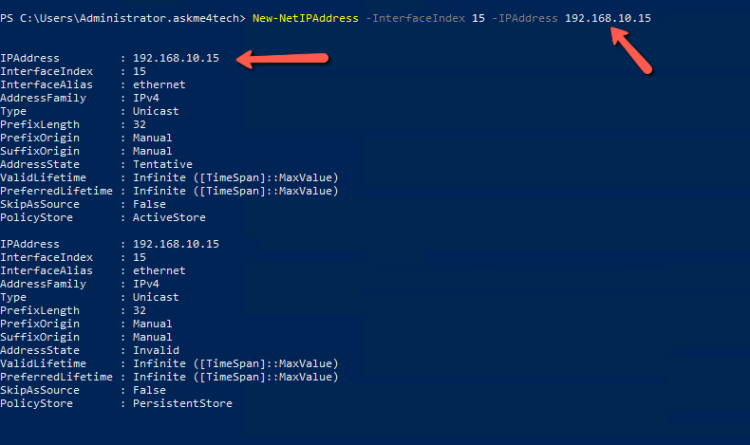
However you can use it if you need to add a 2nd ip address in the same adapter. Let's see the following example
New-Netipaddress -InterfaceIndex 15 -IpAddress 192.168.10.15
But note that if the network adapter has already a static ip address and use the new-netipaddress then will add a 2nd ip address in the network adapter.
How to change Network Adapter from Static IP Address to DHCP
If you want to change a static ip address of the network adapter to receive the ip address from the DHCP you can use the command remove-netipaddress.
Be sure that follow the steps to avoid any downtime
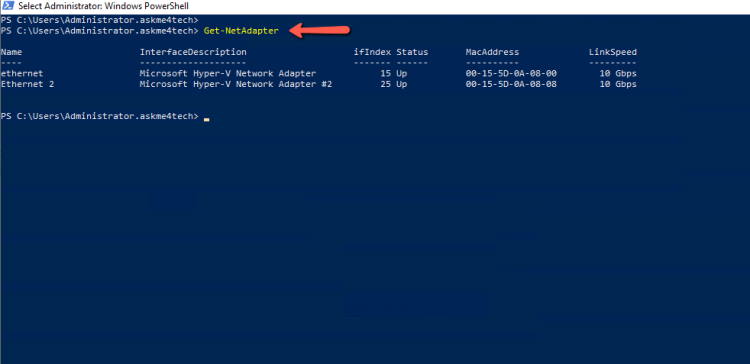
First run the Get-Netadapter to identify the Network Adapter that you want to change static ip to DHCP
An optional step to verify the Ip Address that already has is the following. Also you can verify if the Network Adapter has one or more Ip Addresses.
Get-NetIpAddress -ifIndex 15
Now that you have verify a few things to avoid any downtime you can run the following command
Remove-NetIPAddress -InterfaceIndex 15
If you have more than one ip addresses in the same Network Adapter you can run
Remove-NetIPAddress -InterfaceIndex 15 -IpAddress <the ip address that you want to remove>
How to change the Default Gateway of the Network Adapter
If you want to change the Default Gateway of the network adapter then you need to use 3 powershell command to do it.
First of all must run the Get-netadapter to get the list of the Network adapters and a few info included the ifindex
Then you can run the following command to find out the default gateway that already has
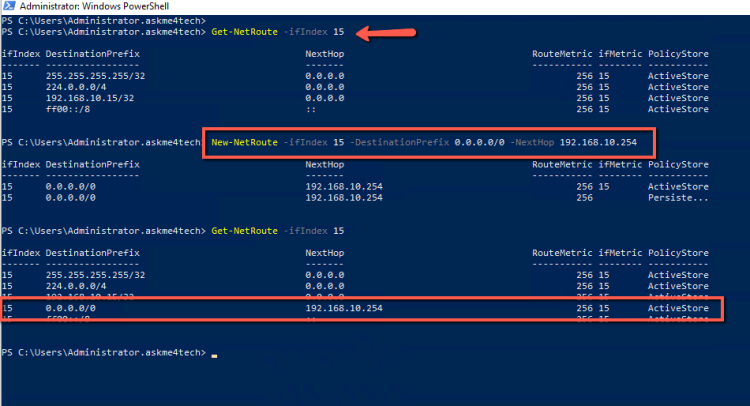
Get-netroute -ifindex 15
After that you must delete the default gateway. You can see the Default gateway in the Next Hop of 0.0.0.0/0 which is the ip address 192.168.10.254 .
After collect all the necessary info you can safely run the following command.
Remove-NetRoute -ifIndex 17 -DestinationPrefix 0.0.0.0/0 -NextHop 192.168.10.254
After run the command verify with the
Get-NetRoute -ifindex 15
You can see that the Next Hop 192.168.10.254 which is the Default Gateway it's not exist anymore.
Finally run the following command to add the new Default Gateway.
New-NetRoute -ifIndex 17 -DestinationPrefix 0.0.0.0/0 -NextHop 192.168.10.253
How to change network adapter name
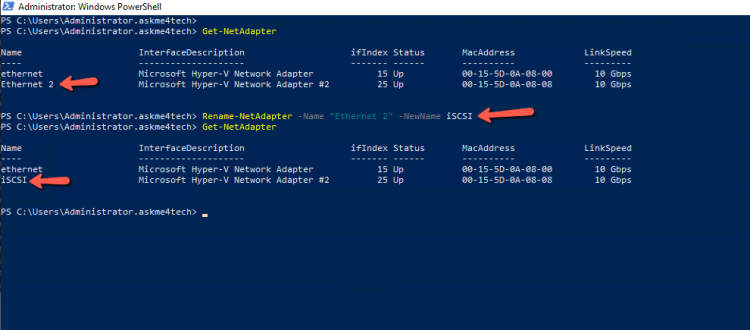
You can rename a network adapter if you want with the following command. I rename Network Adapters when i have multiples network adapters and i would like to understand where every network adapter use it.
For example when set up a Failover Cluster you need different network adapters for the iSCSI ,Management, Heartbeat and so on. In this scenario it's very useful to know the work of every adapter to avoid mistakes.
Rename-Netadapter -name "Ethernet 2" -newname iSCSI
How to change DNS Ip Address of the network adapter
When you must change the DNS Ip address of a network adapter use the following powershell commands to do it.
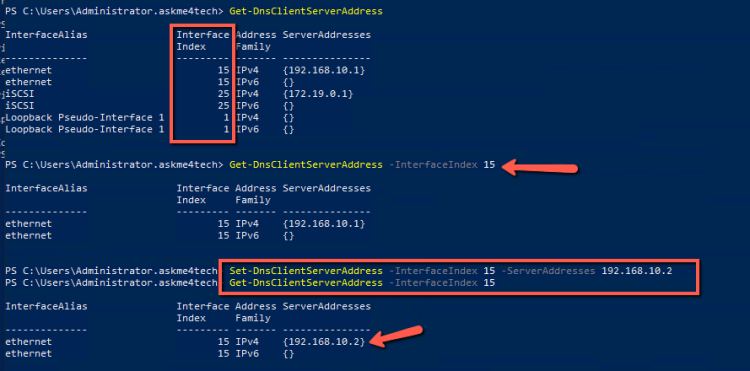
Let's say that we have setup a new network adapter of a Virtual Machine and must be add the DNS Servers.
Get-DnsClientServerAddress to get the list of all the Network Adapters with the Dns Details
After that we can run optional the following command if you would like to see the Dns ip address of the specific network adapter
Get-DnsClientServerAddress -InterfaceIndex 15
Finally we can add the DNS Server IP Address as follow
Set-DnsClientServerAddress -InterfaceIndexf 15 -ServerAddresses 192.168.10.1
How to Disable or Enable a Network Adapter
If you want to disable a network adapter it's not so difficult.
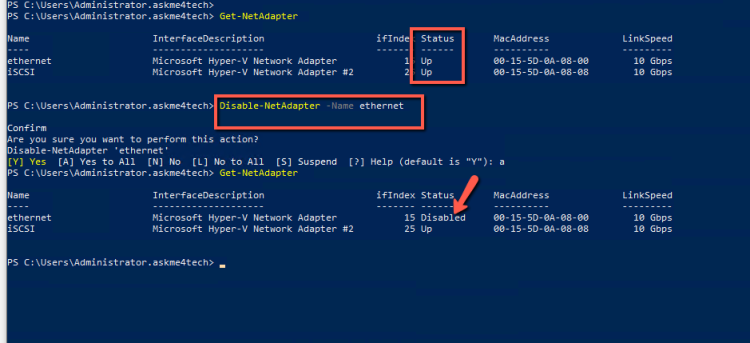
As always first determinate the Network adapter that you want to disable with
Get-NetAdapter
Then run the following powershell command to disable the network adapter.
Disable-NetAdapter -Name ethernet
Last step run again Get-Netadapter to verify that the network adapter has been disabled.
You can enable again the network adapter with the following command.
Enable-NetAdapter -Name ethernet
How to add a network adapter in VLAN
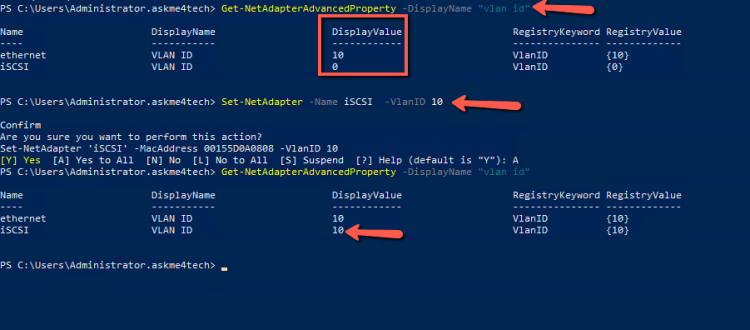
Let's say that you want to change the VLAN ID or add a VLAN ID for a specific network adapter.
For example you have setup a VPN Server with 2 Interfaces. The one is in internal LAN with VLAN ID 10 and the other is for the External Access with VLAN ID 20.
You can run the following powershell commands and configure it:
- Identify the Network Adapter that you must change the VLAN ID with
Get-NetAdapter
- Use the following command to set the VLAN ID
Set-NetAdapter -Name ethernet -VlanID 20
- You can verify the change with the following powershell command
Get-NetAdapterAdvancedProperty -DisplayName "vlan id"
How to get advance Network Adapter Properties
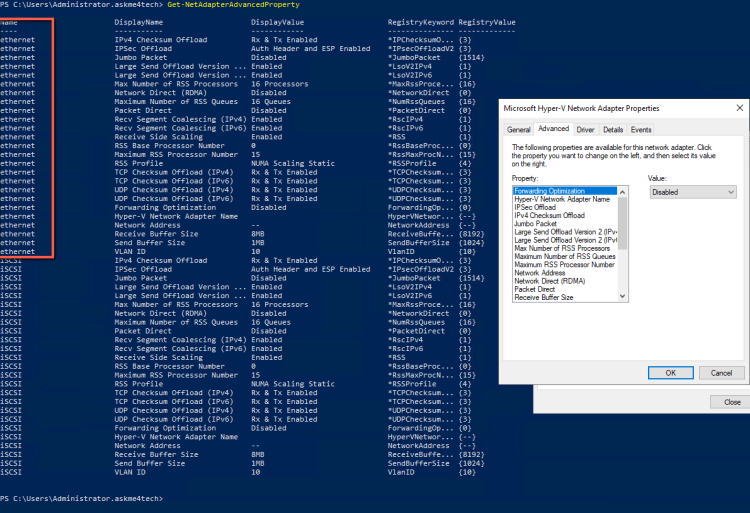
In the beginning of the article i wrote that you can have more visibility with the powershell instead of Graphical User Interface.
You can run the following command to understand why you can have more visibility.
Identify the name the Network Adapter that you need.
In your Powershell console write down and run the following command. All the properties in one page.
Get-NetAdapterAdvancedProperty
Maybe in the beginning it's difficult because you need to learn new things.
But after some time you will understand how much easier and faster is to use powershell and configure network adapters when you must do it in multiple VM's


