How to create a NAT Switch in HYPER-V
Sometimes might need to isolate specific VMs but allow them to have access to the Internet.
We know that if we want to isolate a VM we can use a Private Virtual Switch in HYPER-V. This solution has the disadvantage that the VM will not have an Internet connection. (include the containers)
Today I will explain how can use a NAT Network with a HYPER-V Switch.
What is NAT
I will try to give a simple explanation of what is a NAT.
NAT It's a technology that maps an external IP Address and a port to an Internal IP Address to a much largest set of IP addresses.
The most common example of NAT is the translation of the Public IP Address from a home router to multiple internal or private IP Addresses (Laptops, mobiles, TV).
Today I will explain how can use a NAT Network in HYPER-V.
We will create a NAT Switch that will provide Internet access to multiple VMs from the Host Network Adapter.
How to create a NAT Network in HYPER-V
NAT Switch can use it from Windows Server 2016 and after. It's not supported in Windows Server 2012.
We can't create a NAT Switch from HYPER-V Manager but only with PowerShell commands.
So let's take a look at how can do it.
- Open PowerShell as Administrator
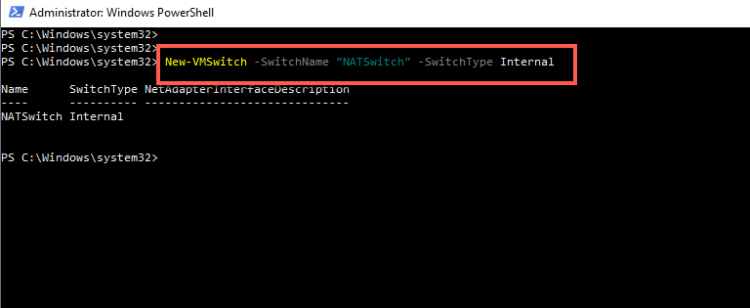
- Run the below command to create the Virtual Switch in HYPER-V
New-VMSwitch -SwitchName "NATSwitch"-SwitchTyper Internal
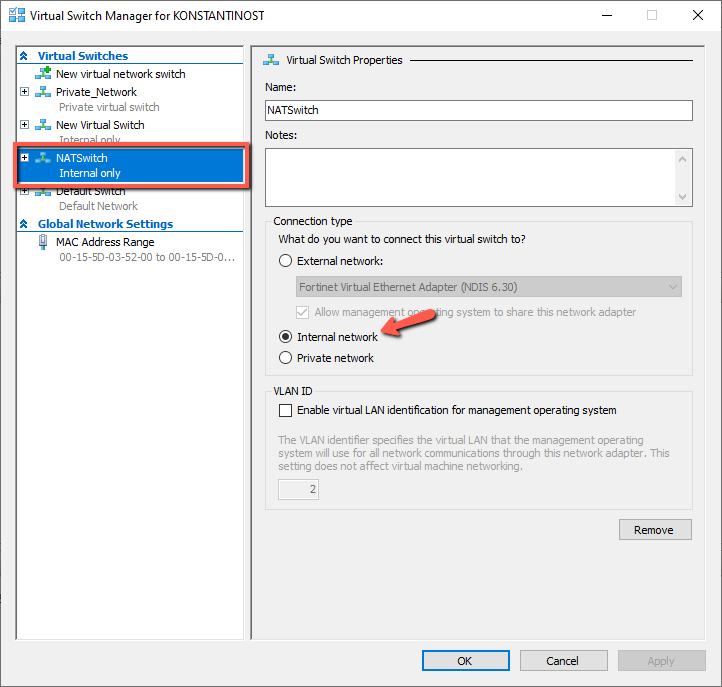
- You can see the Virtual Switch from the HYPER-V Manager as well.
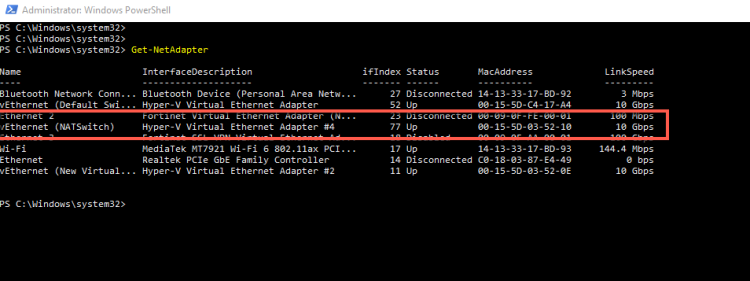
- Now run the below command to get the Index Number of the Virtual Switch Interface. Will be used to give an IP address on the specific Interface.
Get-NetAdapater
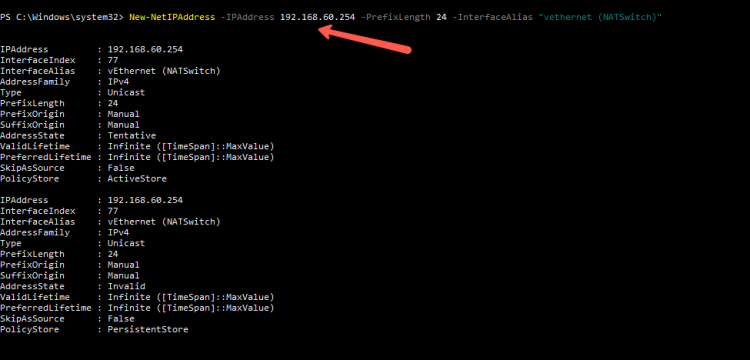
- We will run the following to give an IP Address to the NATSwitch. This IP Address will be used as a Gateway in the VMs
- You must have decided the IP Range that will give to the VMs
New-NetIPAddress -IPAdress 192.168.60.254 -PrefixLength 24 -InterfaceAlias "vEthernet(NAT")
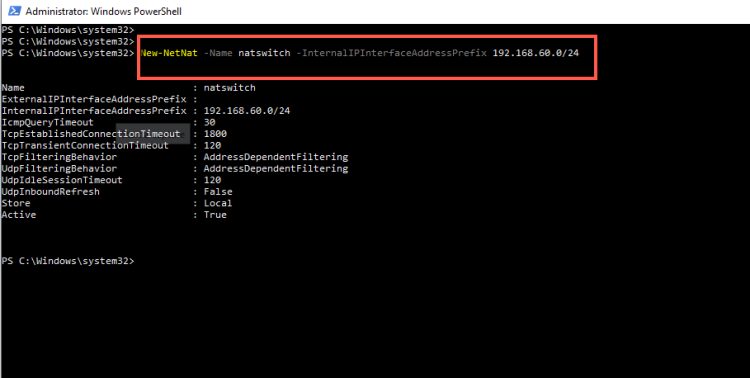
- Now we can create the NAT in the NATSwitch.
New-NetNat -Name "NatSwitch" -InternalIPInterfaceAddressPrefix 192.168.60.0/24
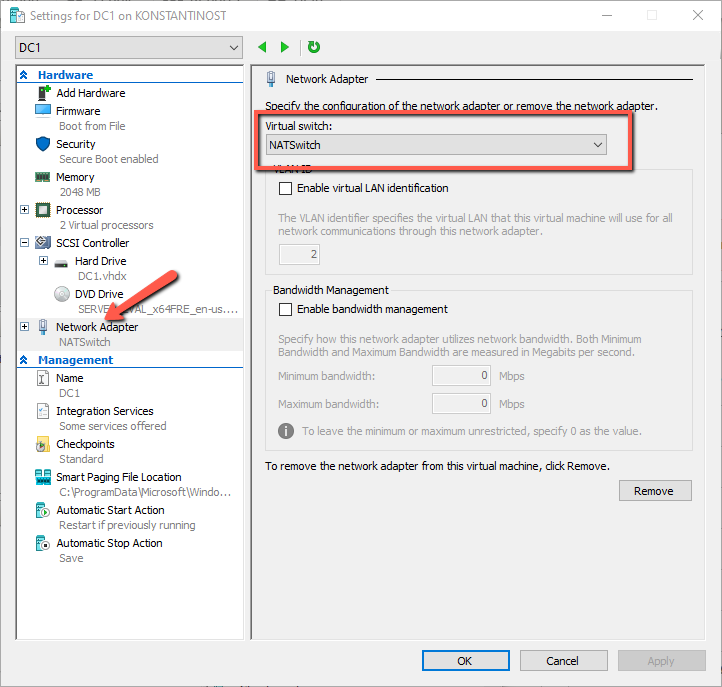
- Open the HYPER-V Manager and select the VM that you want to use the NAT Network
- Click Settings.
- Select the Network Adapter. From the right side in the Virtual Switch select the Switch that we created before.
- Now login to the Virtual Machine.
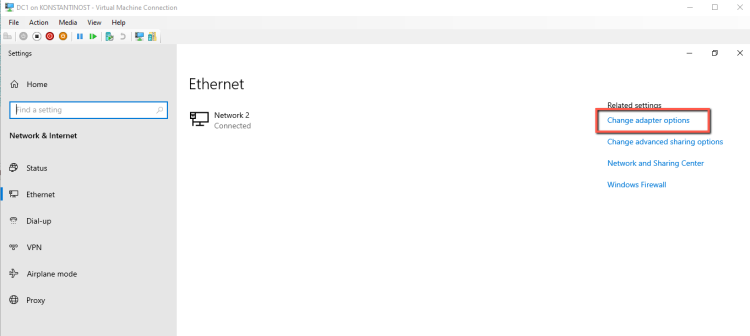
- Click Start and type Ethernet Settings.
- Click on Ethernet Settings.
- From the left side select Change adapter options.
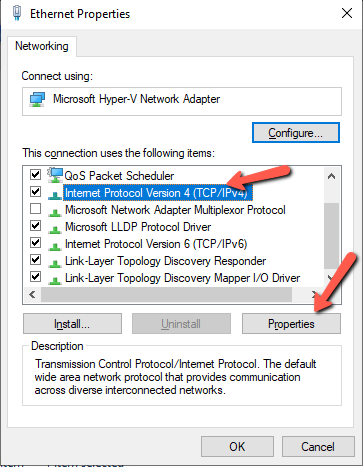
- Right click on the Interface and select Properties.
- Click on Internet Protocol Version 4 and select Properties.
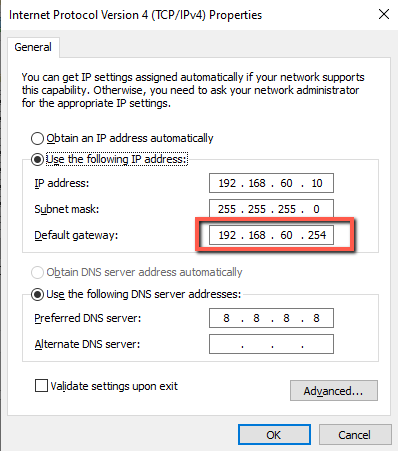
- Configure the IP Address in the range of the NAT Network.
- The default Gateway will be the IP Address that gave in the NAT Switch.
- Configure your DNS Servers and click OK.
- Now the VM should has access to the Internet but will not communicate with the HYPER-V Host.
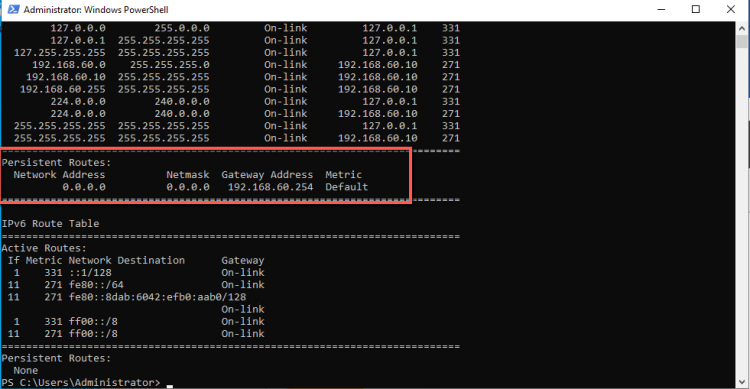
- In case that you can't connect in the Internet, check the routing with the route print command to verify that all the traffic goes to the Default Gateway.
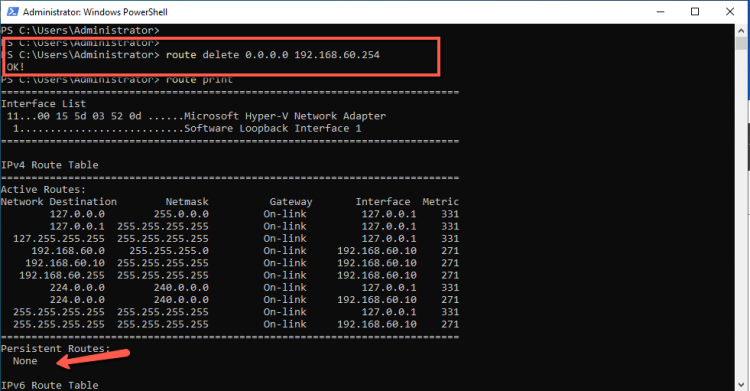
- If you will see more that one routes in the Persistent Routes then use the route delete to delete the routing and add again the Default Gateway.
- The route delete command can use it like route delete 0.0.0.0 192.168.60.254
I hope to learn something valuable today.
Have a nice weekend !!


