How to enable BitLocker from Group Policy
This year I have heard many times about BitLocker. Most often for the devices that were out of the office as user Laptops used at customers or when working from home.
BitLocker can reduce the risk of unauthorized data access when the device is stolen or lost.
To enable BitLocker it's a simple procedure for a standalone device. But it's more difficult when you must enable the BitLocker on 50 Laptops.
What about Group Policy? Why not use a Group Policy to enable the BitLocker in the devices that you want?
So let's start !!!
Requirements
BitLocker haven't lot of requirements.
- The partition that will encrypt must be FAT32 or NTFS.
How to install the BitLocker
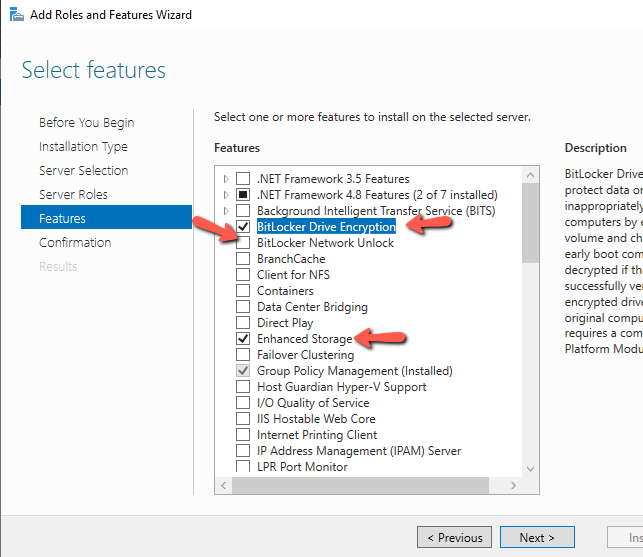
For the Windows 10/11 the BitLocker it's installed by default with the Operating System. If you want to apply the BitLocker on a Windows Server then must be install the Feature
- Open the Server Manager.
- Select Manage -- Add Roles and Features.
- Click Next on the Welcome Screen.
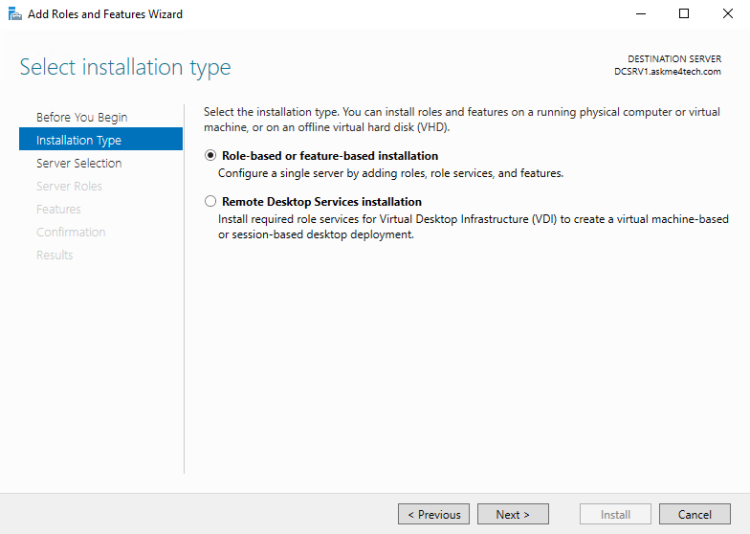
- Click Next with the default selection Role-based or feature-based installation.
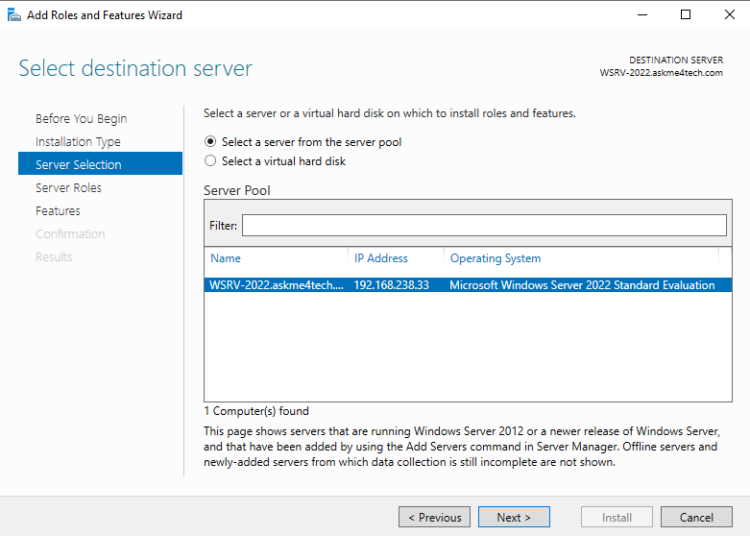
- Once again click Next without change nothing.
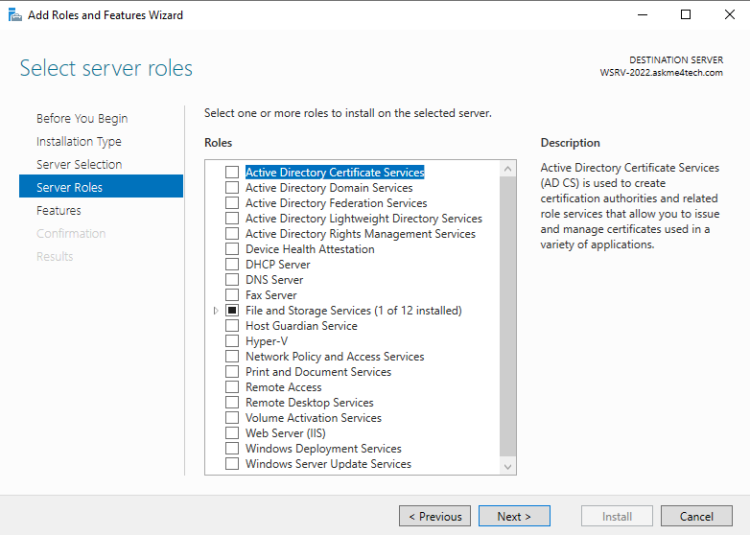
- Click Next on the Roles.
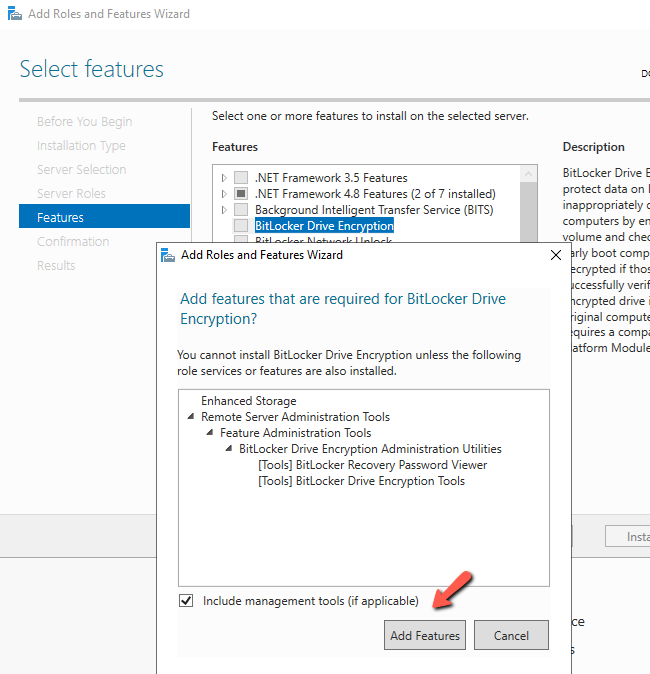
- Check the BitLocker Drive Encryption Feature. Click Add to install the features that are required for the BitLocker Drive Encryption.
- The Enhance Storage feature will be installed as well.
- If you have in mind to use the BitLocker Network Unlock then you must install the feature as well.
- Click Next and Install to start the Installation.
- After the installation finished a restart is required.
- Now it's ready to encrypt the Drive.
How to create and configure the Powershell script to run the encryption on the devices
Because the Group Policy for the BitLocker will be Turn On the BitLocker but will not encrypt the Disk Drive we must create a PowerShell Script to run when the Computer start and encrypt the Disk Drive.
While the encryption will started the BitLocker will be apply all the settings that we have configured from the Group Policy.
So let's deep in !!
I wrote a simple PowerShell script because most of the settings will be applied from the Group Policy.
The PowerShell script is the following but you can write your own or add more features based on your requirements.
Change the password and the StartupKeyPath respectively.
$pass=ConvertTo-SecureString "Mylab1234" -AsPlainText -Force
Enable-BitLocker -MountPoint "c:" -SkipHardwareTest -StartupKeyProtector -StartupKeyPath "\\192.168.10.1\blrecovery"
My first step was to run the PowerShell script in one of my devices to verify that it's working correctly.
After all works fine the next step is to include the PowerShell Script to the Group Policy and run it when the Computers Start.
So let's continue to find out how can configure the GPO to enable the Bitlocker and include the PowerShell script to run the encryption.
How to configure the GPO
Last step is the creation and configuration of the Group Policy that will be enable the BitLocker and deploy the PowerShell script on startup of every machine
- Open the Group Policy Management Console and create a new Group Policy
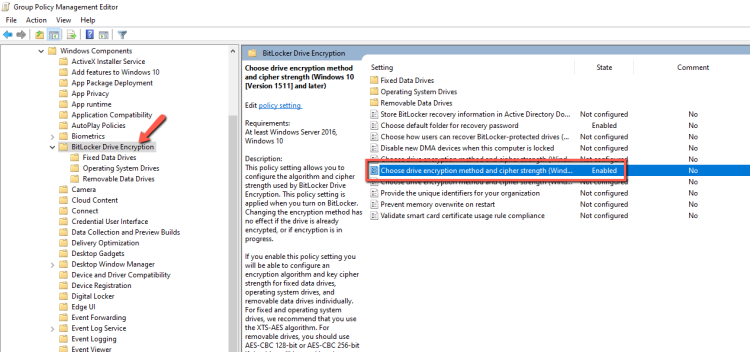
- Navigate to the Computer Configuration -- Administrative Templates -- Windows Components -- BitLocker Drive Encryption.
- Expand it and select the Operating System Drives.
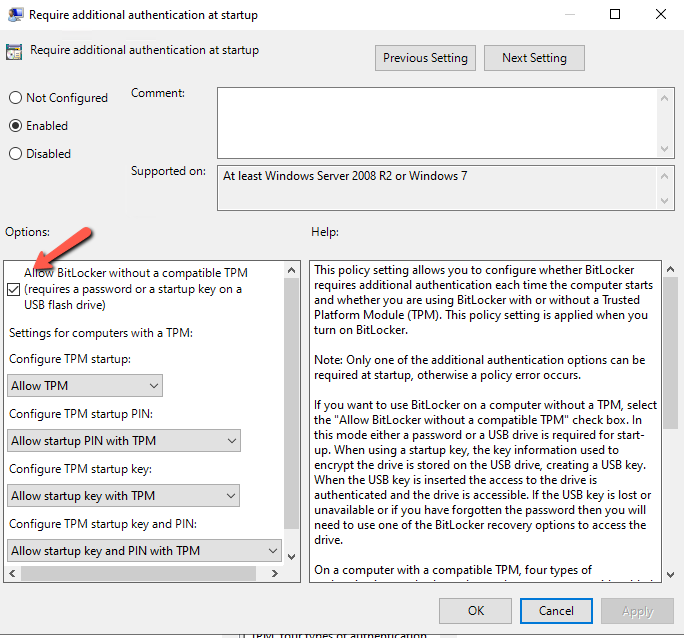
- The Policy that you need to enable the BitLocker is the Require additional authentication at startup.
- Right click and select Properties
- Enable the policy and keep checked the Allow BitLocker without a compatible TPM ... if you don't have a TPM in each device.
- Leave the other options as it.
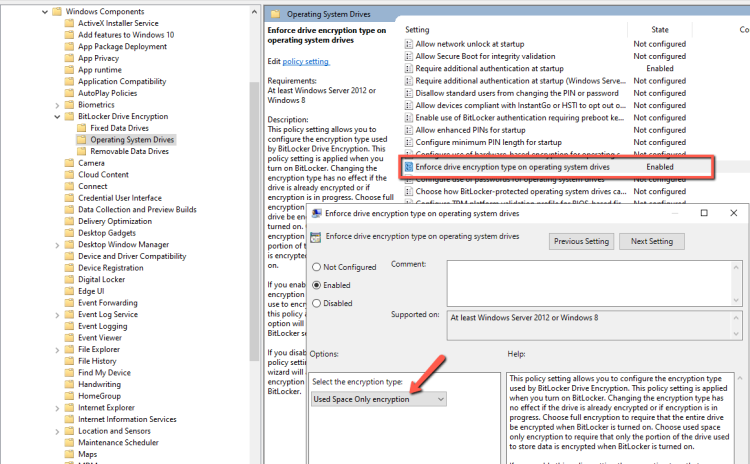
- Some other useful Settings that can be use is the Enforce drive encryption type on operating system drives.
- Open it and select the Used Space Only Encryption.
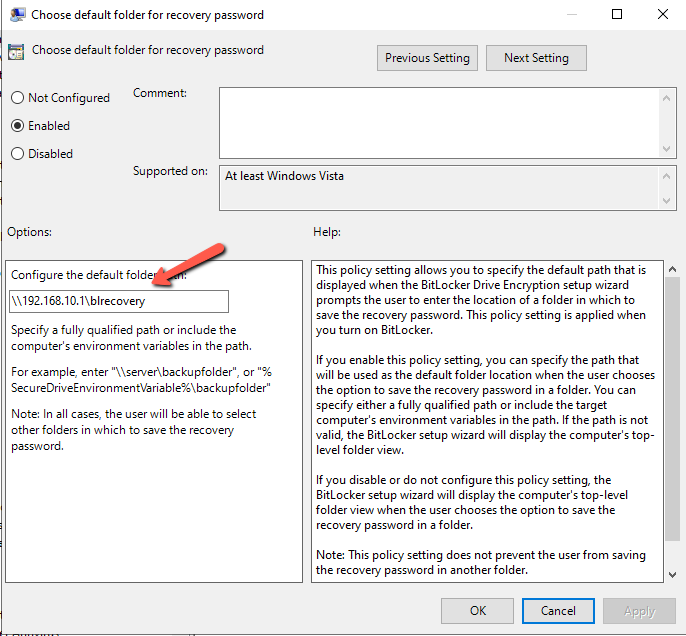
- Select the BitLocker Drive Encryption and open the Choose default folder for recovery password.
- Click Enable and type a path of a share folder that can use to save the recovery password.
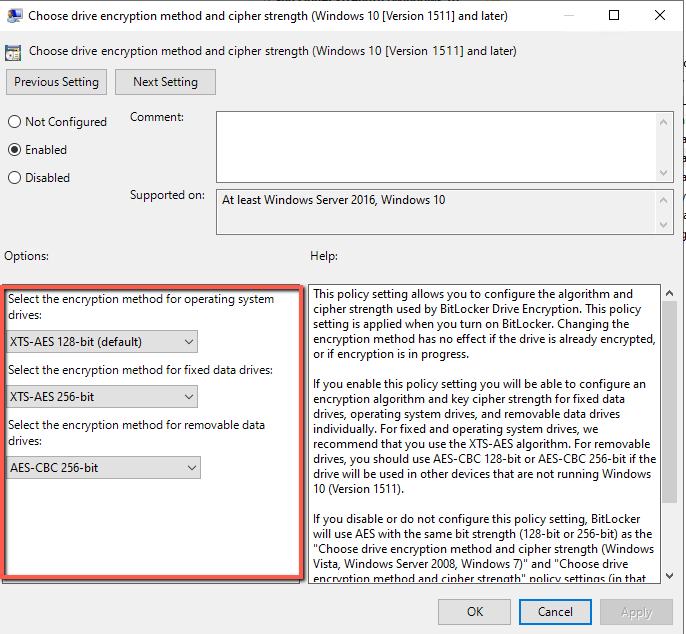
- The Choose drive encryption method and cipher settings as well.
- Select the encryption method that you would like to use for the operating system drives ,fixed data drive and removable.
- Now let's go to include the PowerShell Script in order to start the encryption when the Computers will start
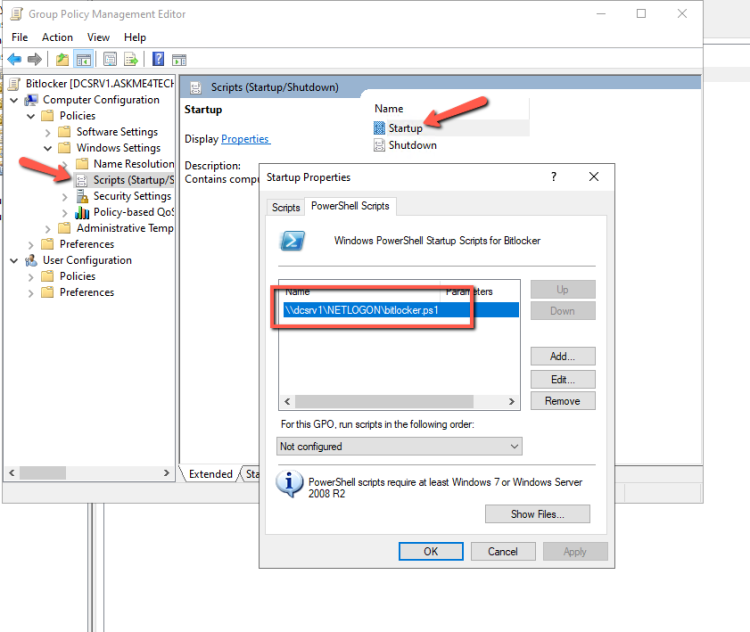
- Go in Computer Configuration -- Policies -- Windows Settings.
- Click on Scripts (Startup/Shutdown)
- Open the Startups. Click on Tab PowerShell Scripts.
- Click Add and type the path \\<yourDC>\NETLOGON\<powershellscript name>
- Click OK and again OK
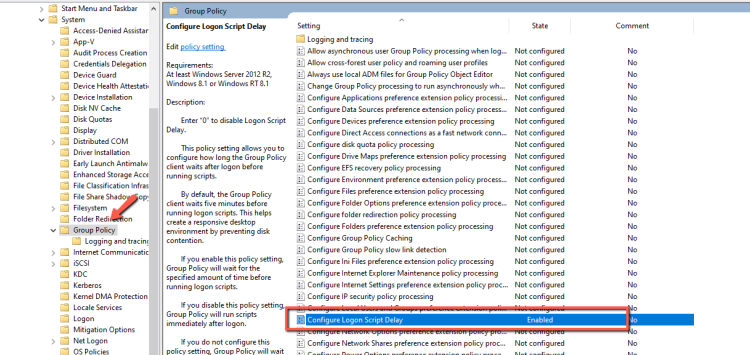
- Now let's go to configure a delay before the PowerShell script starts to run.
- This is very useful when we have PC's that it takes time to start.
- Go in Computer Configuration -- Policies -- Administrative Templates -- System -- Group Policy.
- Enable the Configure Logon Script Delay
- Wait until the Group Policy apply on the PC's or run a gpupdate /force in one of them to test the process.
- Restart the PC after gpupdate /force and login again.
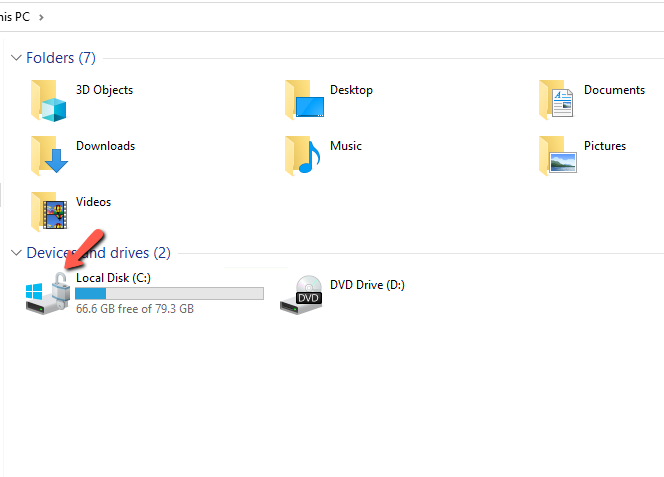
- After few minutes your Drive should looks like this
You have so many settings that can be configure. But the most common is the above. Read carefully all the settings and decide which of them can be helpful for you.
Have a nice weekend !!


